Introduction
In the contemporary world, large amounts of data paired with intelligent analytics provide important value to organizations that are looking to deliver the best product possible to their customers. Cloud computing with Azure and Azure Data Factory services allows creating and using complex ETL and ELT processes on relational and unstructured data which can be a huge challenge if you try to build such a complex system for these tasks by yourself. With the client libraries for Azure Data Factory, we are going to show how you can trigger and monitor Pipelines through Web API built with .NET.
Sections:
Requirements
Data Factory
.NET Backend (Client Application)
Showcase
Conclusion
Requirements
To follow this tutorial you will need to have:
Azure Subscription - To authenticate, create Data Factory and Pipelines. Free Trial
IDE or Code Editor - to write client applications (Visual Studio, JetBrains Rider, VSCode...)
API/REST Development Tool - if you don't want to use Swagger to test the API actions (Postman, VSCode Rest, Insomnia REST Client...)
Azure subscription and setup
Note: If you have this already configured, you can skip to the next section.
Free trial Azure subscription lasts 12 months and gives you 200$ worth of Azure services and products which is more than enough to complete this tutorial. For the most basic usage, we will need to have the following things set up:
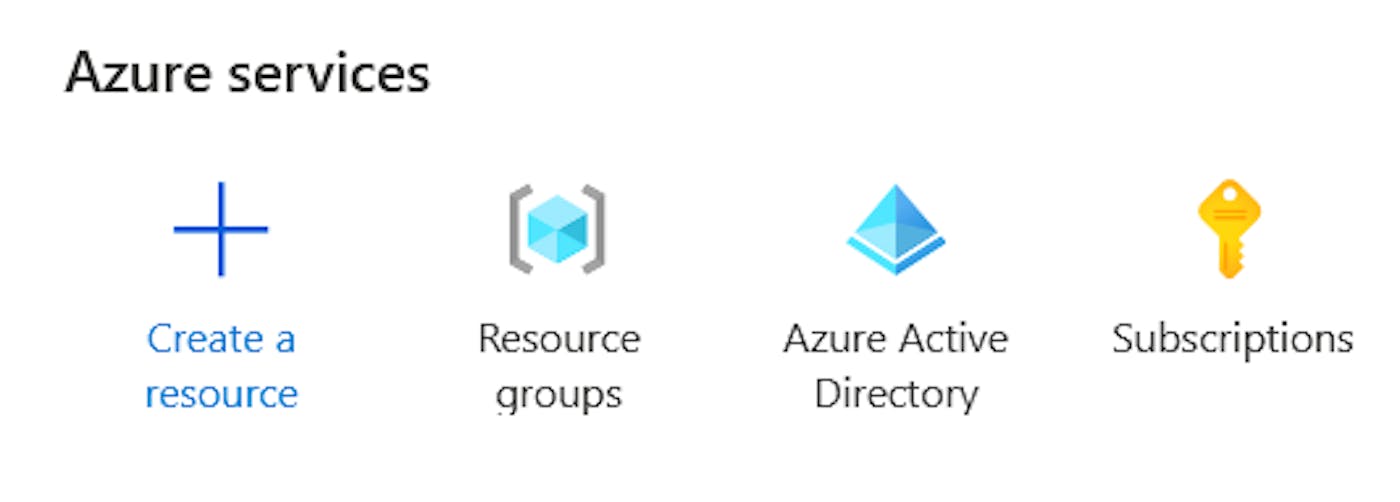
Resource Group - Hold related resources together (in our case it's only a Data Factory resource, but it could also include Database, Blob Storage, Web App, Azure Function App, etc..)
Data Factory - To create, run and monitor pipelines
Azure AD App Registration - To authenticate and receive access tokens for using Data Factory
Resource Group can be created by navigating to the Resource Groups tab on the Azure Portal homepage.
Click on the Create button and follow the simple 3 step process
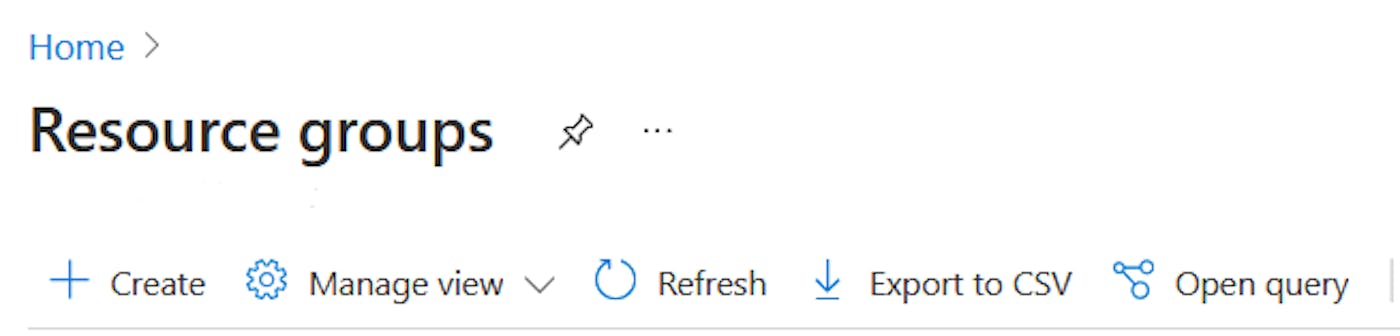
After completing the creation process, the resource group will be displayed in the Resource Groups tab.
Next, we need to set up the App Registration in Azure AD. App registrations provide an identity platform for applications to authenticate and authorize against.
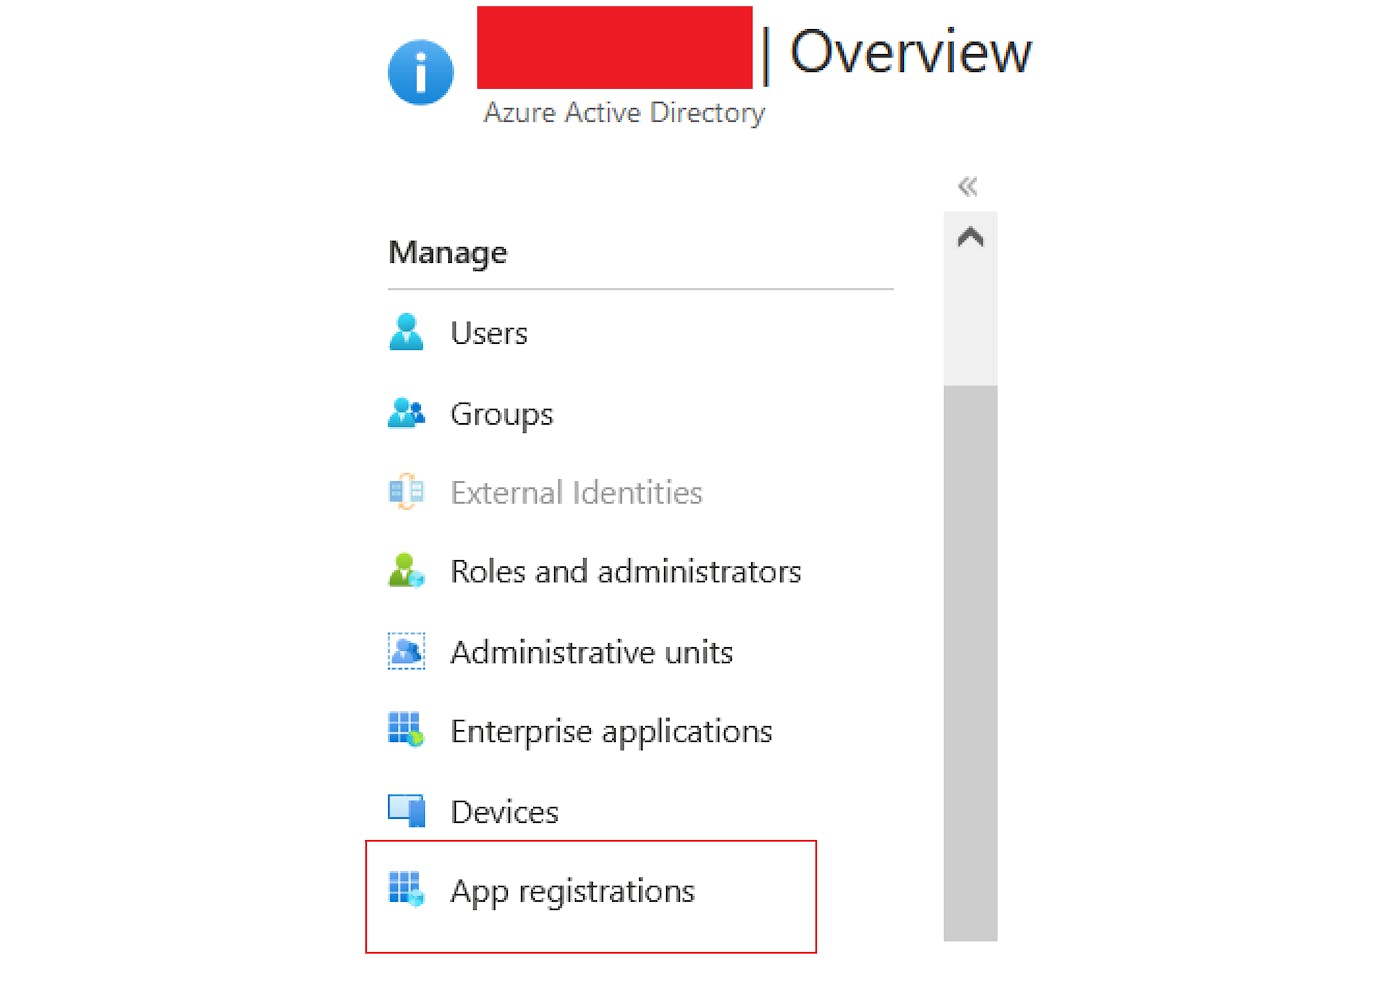
Navigate to the Azure Active Directory tab and under Manage on the left side, choose App Registrations. Create a new one by clicking on the New Registration button, for the Redirect URI you can specify the URL that your application will be running on (if you are running this locally you would put https://localhost:port/signin-oidc).
Besides creating the App Registration, we also need to create a Client Secret which will be used as a password to identify our client application with authentication service. This can be done by navigating to App Registration and clicking on Certificates & Secrets in the left sidebar under the Manage section. Switch to Client Secrets and click on the New client secret button. Enter description and expiration time and click on the Add button. Be sure to store this secret somewhere in a file because it will not be possible to see this value again.
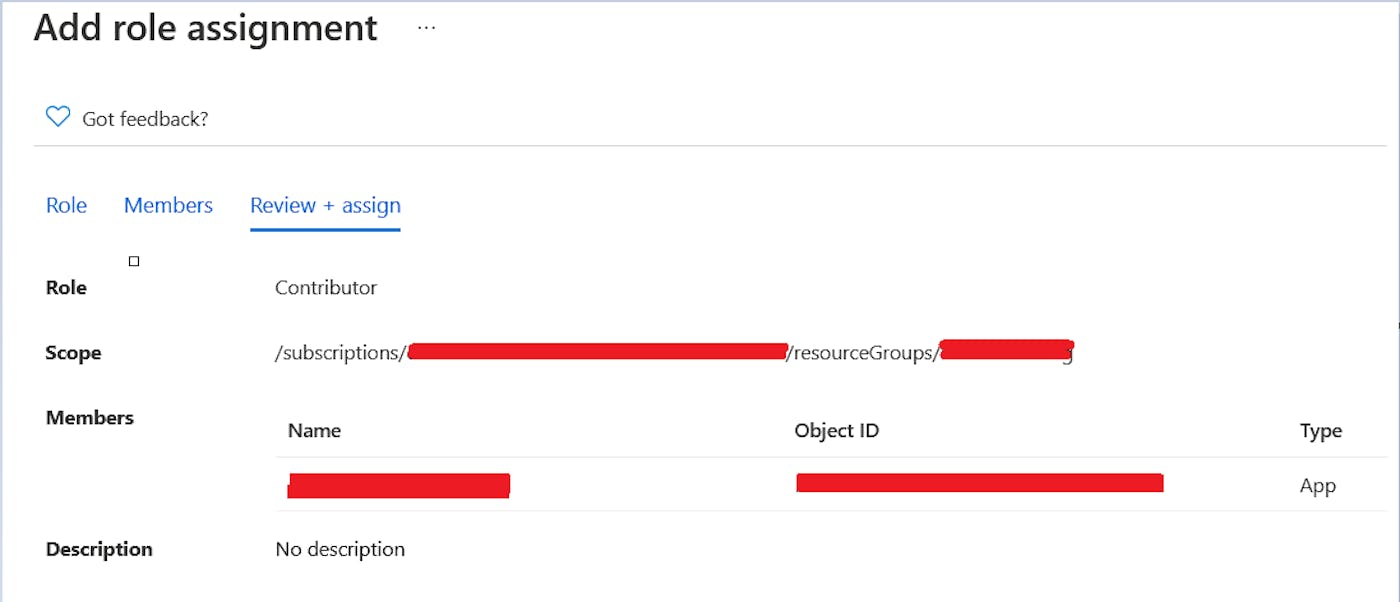
Now we need to register this App with our resource group which can be done by navigating to the resource group that we created and selecting Access Control (IAM) on the left sidebar. Clicking on the Add Role Assignment, we should assign the Contributor role to the App Registration that we created in the previous step (search for the name that you specified under the "User Facing Name" property in App Registration).
All that's left to do is to create Data Factory and we can do that by going to the resource group that we created, clicking the Create button, and typing "Data Factory" in the search bar, and following the resource creation process.
Azure Data Factory
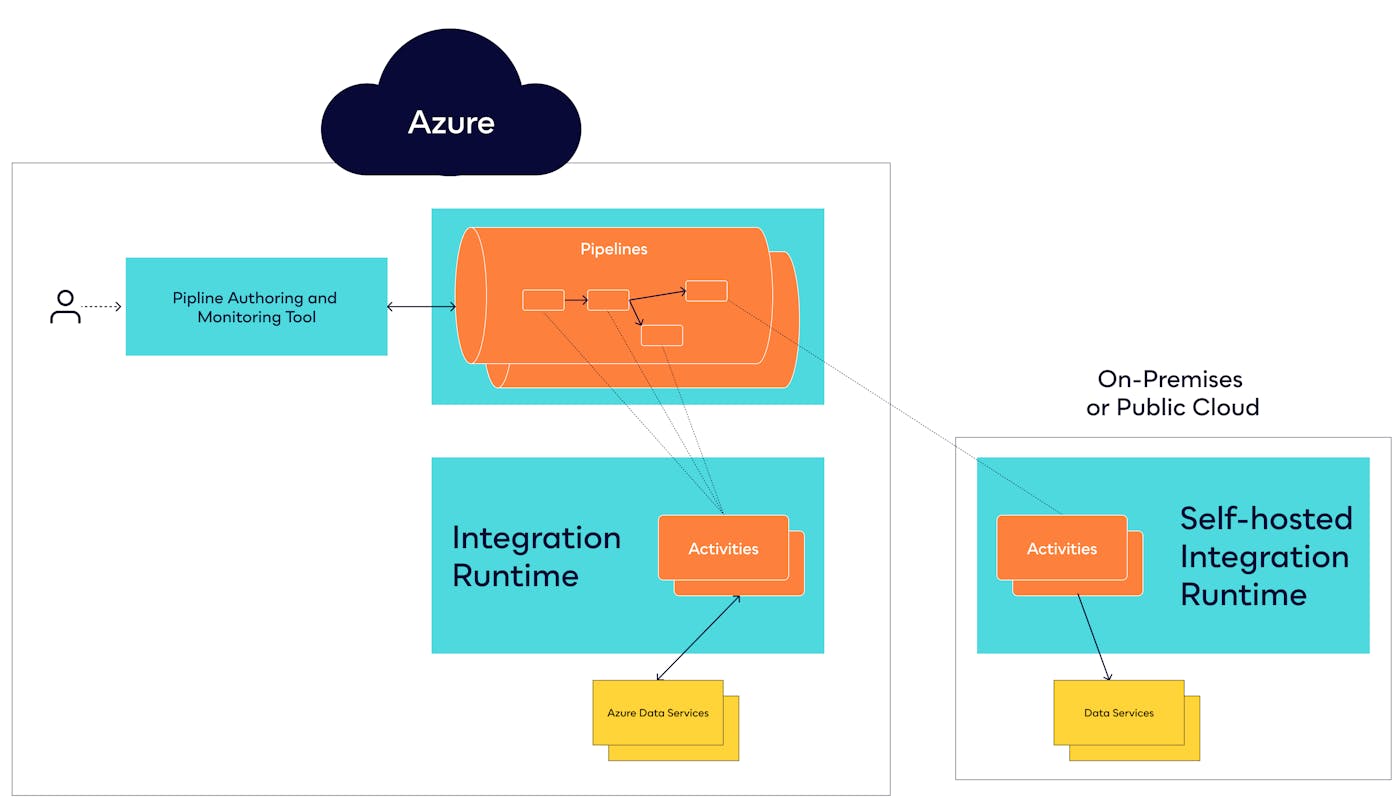
ADF is a single cloud service for data integration across all of your data sources, whether they’re on Azure, on-premises, or on another public cloud, such as Amazon Web Services (AWS). It provides a single set of tools and a common management experience for all of your data integration
One of the top-level concepts or components of Azure Data Factory is Pipelines which act as a grouping of separate Activities that together perform a task and can be run chained together in a sequential manner or independently in parallel. Azure Data Factory and Azure Synapse Analytics have three groupings of activities: data movement activities, data transformation activities, and control activities.
Pipeline creation process
For the needs of this tutorial, we will create a very simple pipeline called Blog_Pipeline that will receive parameter username which will be appended to the message "This file has been created by @username" and written to a file.
To accomplish this we will need to do the following:
Create Blob Storage resource
Create Template.txt file with sample word in it which will be used to create new .txt file (this is the "hacky" way of creating a file from a parameter or variable since Data Factory does not allow to directly use the dynamic content as a source for the Copy Data activity)
Create input and output Datasets
Add Copy Data activity to write to a file
Setting up Storage account resource
To accomplish this, navigate to the Resource Group that was previously created and add a new resource of type Storage Account. Select your resource group, pick the right region, name the storage account resource as you like, and leave the rest of the things as default. If you did everything correctly, you should have your storage account under the resource group.

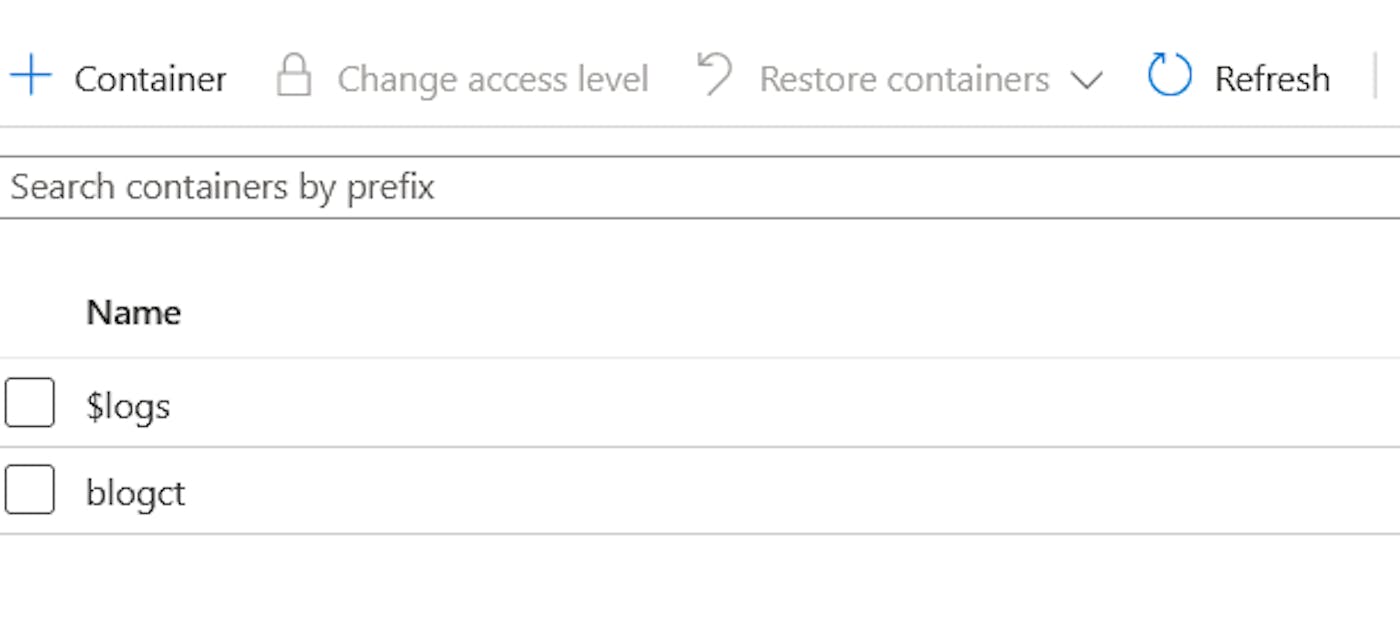
Now we need to create a container and create the Template.txt file and upload it to the storage account. To create a container, on the left sidebar go to the Containers section and click on +Container to create the new container, name it as you like, and leave the defaults.
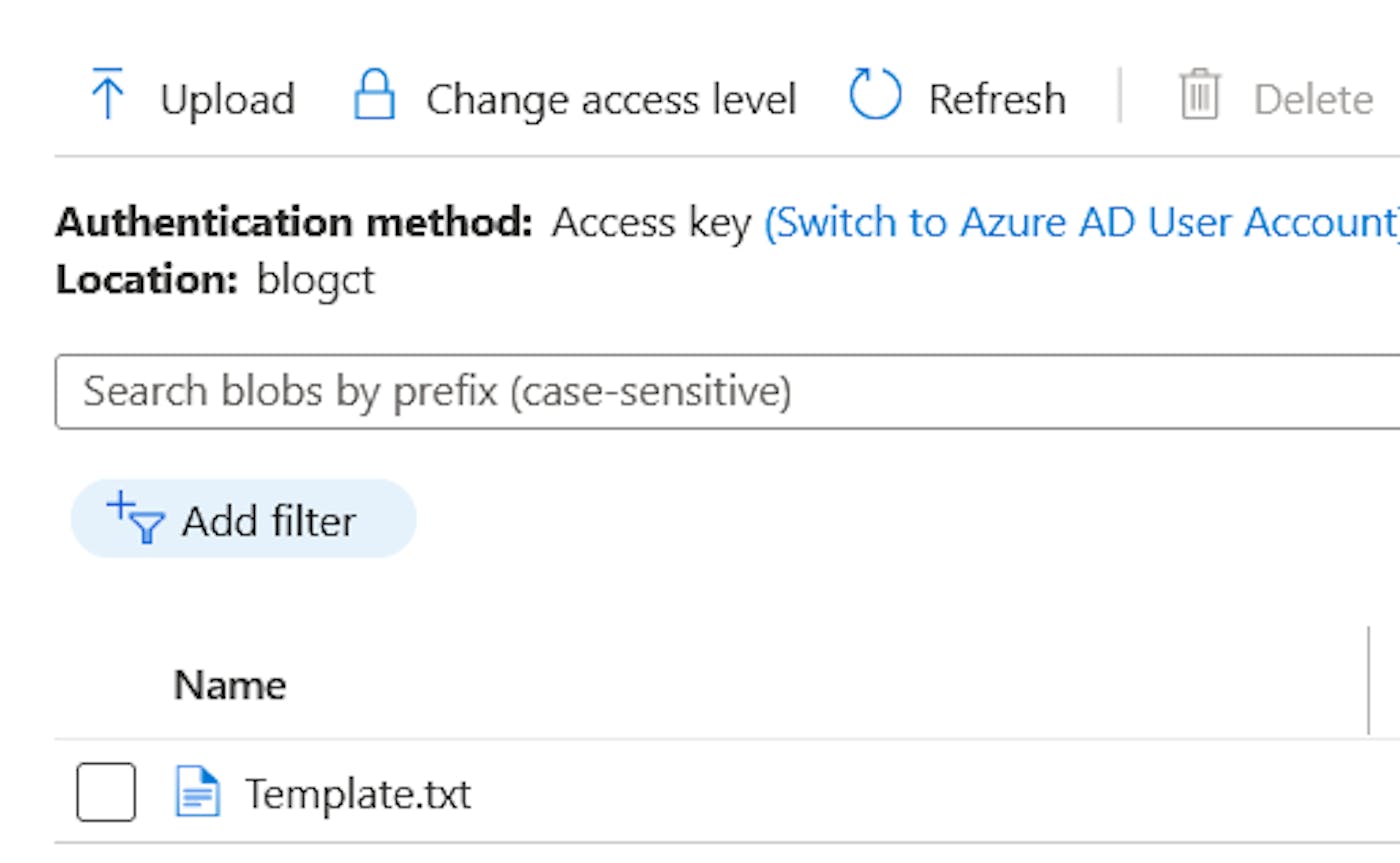
The content of the template file can be anything, you can write "test" or "column". To upload a file, go back to the container that you have just created, click on Upload and follow the process. Upon completing the upload process, you should have something as shown in the picture below.
Adding new Datasets and Pipeline
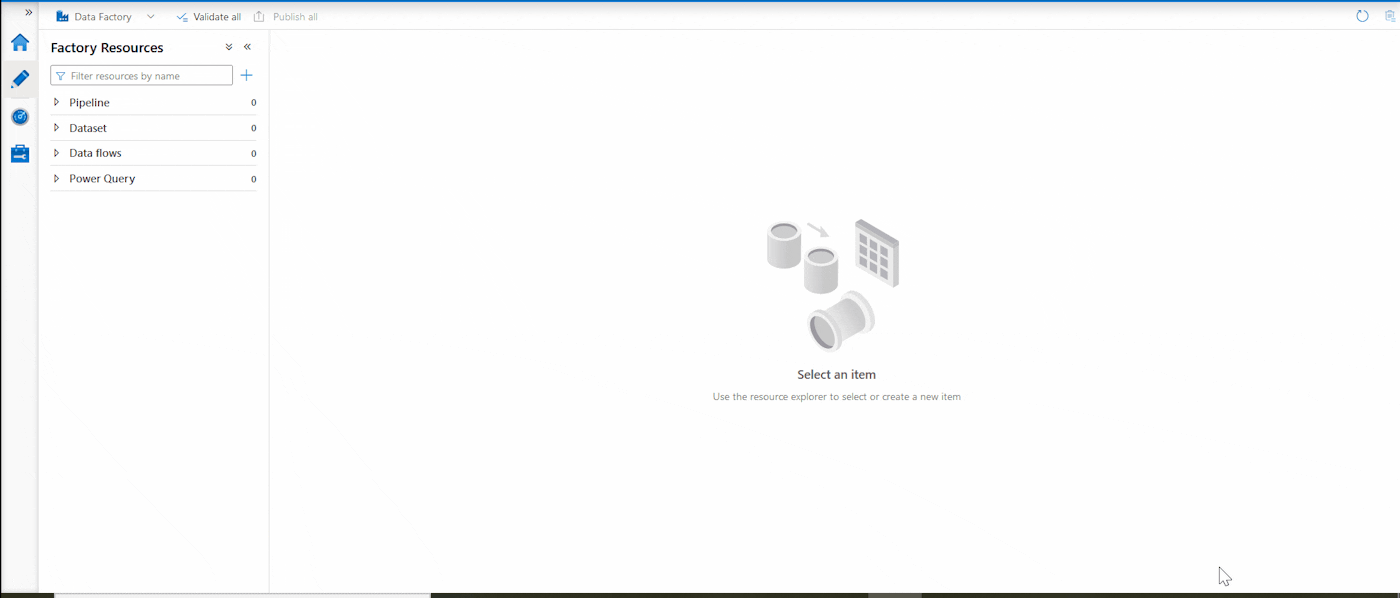
We will create the pipeline through the GUI so head over to the adf.azure.com, log into your account and select the Data Factory from the resource group that you created, and click on Author on the left sidebar.
We will first create 2 datasets named CSV_Template, CSV_Output. In the process of creating datasets, we will create a linked service to our Storage account which is demonstrated in the gif below.
We will do the same thing for the CSV_Output dataset except that we don't have to create the linked service again and there is no output file yet so we will leave it out in the creation menu, however, we will specify the name in the Connection section once it's created.

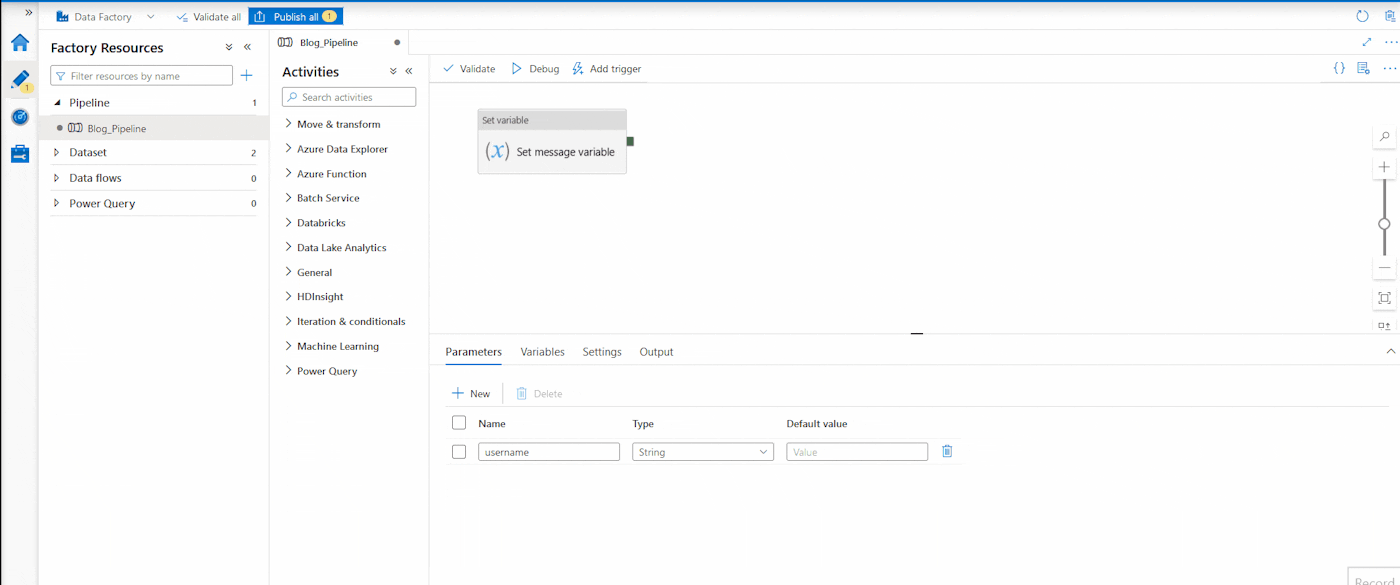
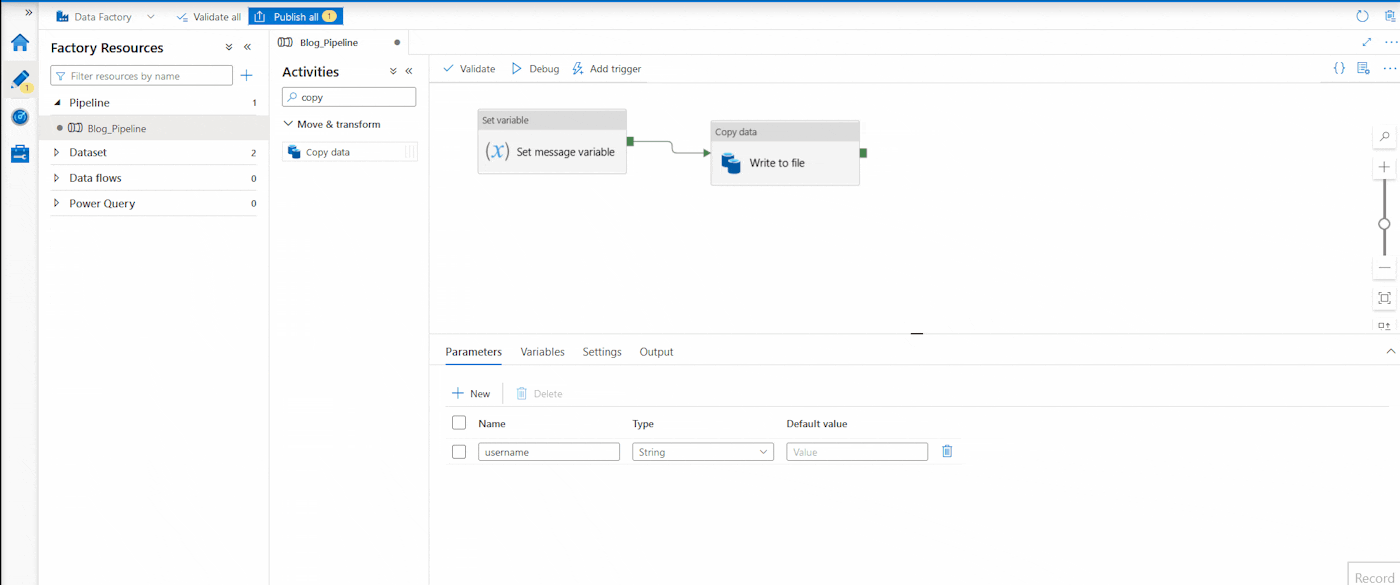
Our pipeline logic will consist of two activities:
Set Variable Activity - we will use this to set the text that will be written to a file
Copy Data Activity - will be used to actually create the file
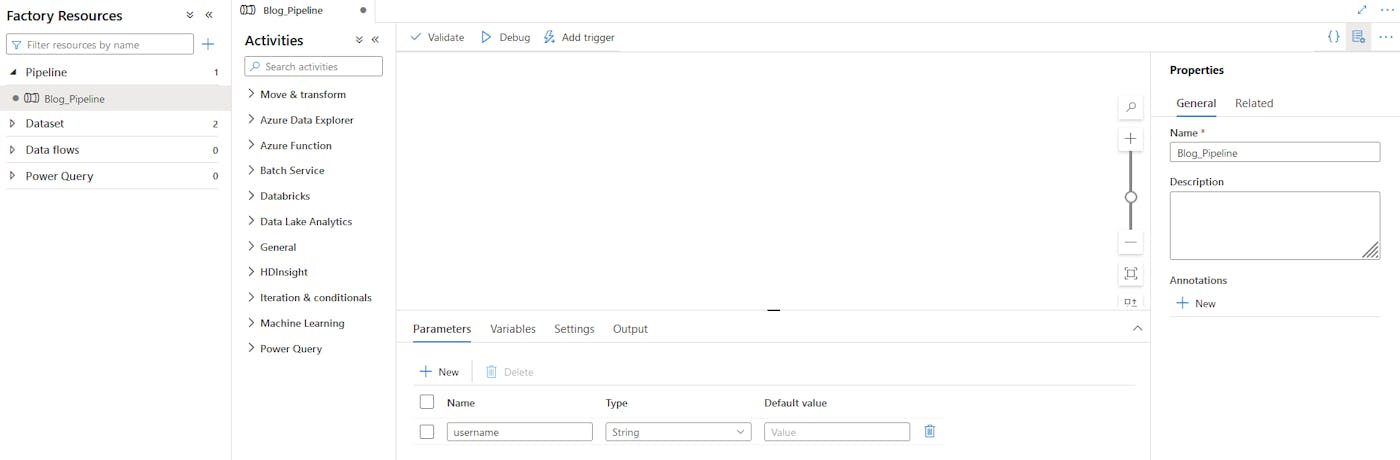
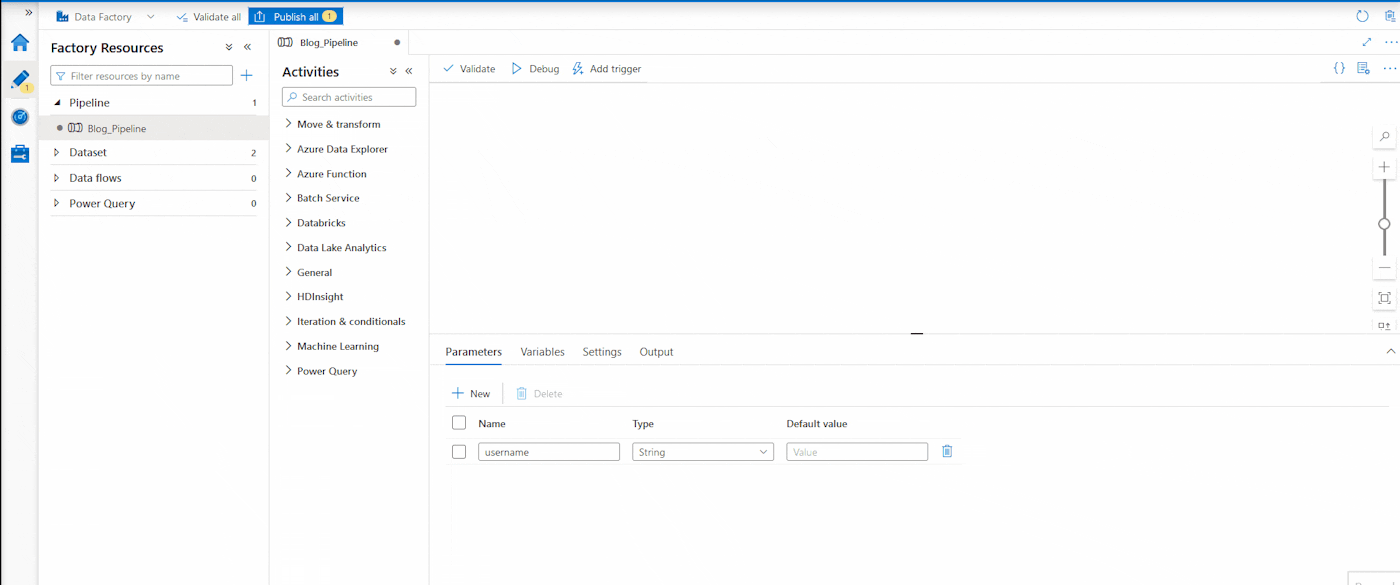
To create the new pipeline, right-click on the pipelines and add a new pipeline with the parameter username. In the Variables section add a new variable called message.
Process of creating the Set Variable activity is demonstrated in the gif below.
Now we need to chain the output of this activity to the new activity. For the Copy Data activity, we will need to use the datasets that we have previously created and set up the mapping part.
To test the pipeline, we can run it in Debug mode. When you click on the Debug you will be prompted to specify the username, you can enter anything as this is just for testing purposes, later on, we will pass this parameter through the C# code. After clicking on the Ok button and the pipeline finishes successfully, head over to the storage account container and check if the file is present.
The pipeline logic itself will be different for everyone depending on the output that should be achieved through the ETL process. Creating pipelines can vary from being very simple data movement to very complex data transformations and it is not the main focus of this tutorial. So without delving into too many details, we created a very basic ADF Pipeline to be used in this tutorial. Creating the pipeline can be done both by GUI, through Azure Portal (as of ADF v2) as shown in the gifs, or programmatically through client libraries written in several languages. The rest of the tutorial focuses on triggering and monitoring the pipelines through C# code. For more information check out Use Portal to create Pipelines, Pipelines and Activities.
After following all of the steps above (including the Azure Subscription and setup section), you should have the 7 important pieces of information that you will need in order to use Data Factory from the C# client application:
ResourceGroup - the name of the Resource Group
DataFactoryName - the name of the Data Factory resource
TenantId and ApplicationId - you can find these under the App Registration that you created in Azure AD
AuthenticationKey - this is the Client Secret value that we created
SubscriptionId - can be found under the Overview tab in Resource Group that you created
Pipeline Name - this is the name of the pipeline that you created in Data Factory and it will be contained in the HTTP request to our API.
.NET Backend
For our backend, we will create a very simple REST API.
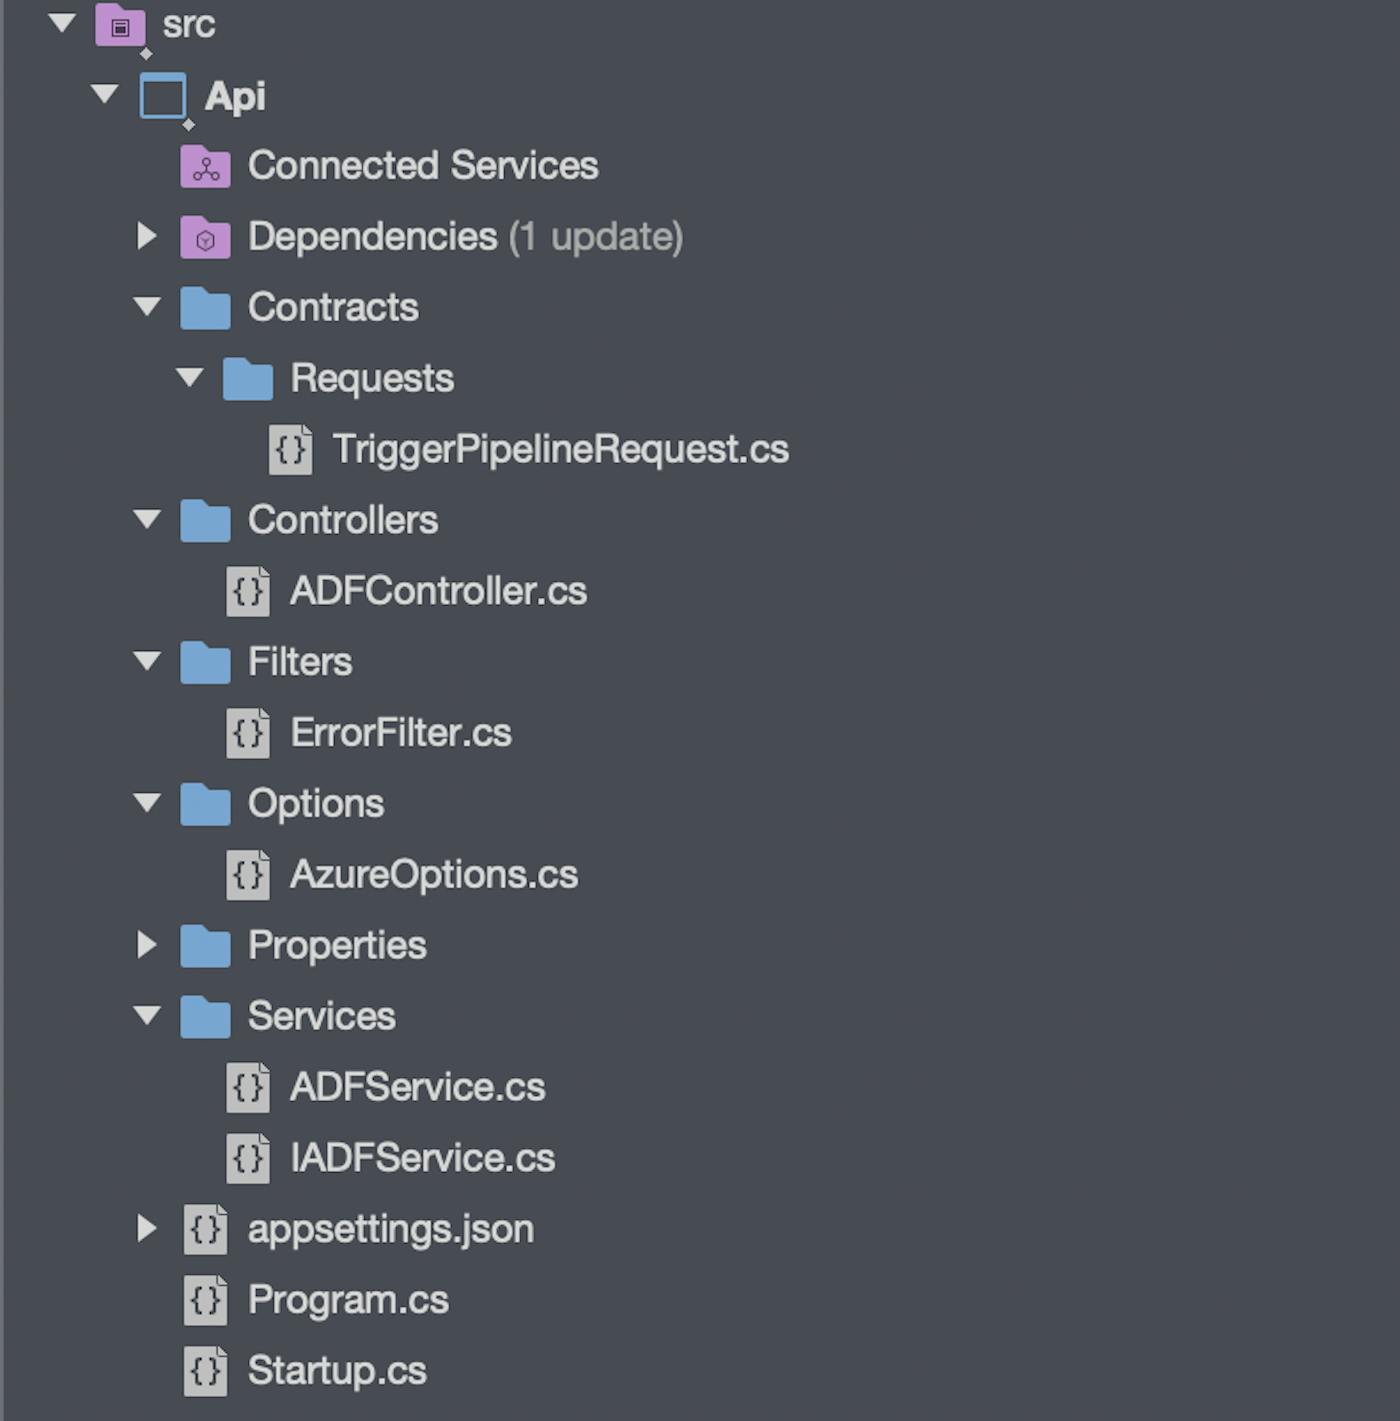
Initial Configuration
We will begin by configuring the swagger documentation so we can showcase how the application works and also add the controllers that will handle the HTTP requests. We will also set API routes to be lowercase but this is only optional.
using Api.Options;
using Api.Services;
using Microsoft.AspNetCore.Builder;
using Microsoft.AspNetCore.Hosting;
using Microsoft.Azure.Management.DataFactory;
using Microsoft.Extensions.Configuration;
using Microsoft.Extensions.DependencyInjection;
using Microsoft.Extensions.Hosting;
using Microsoft.IdentityModel.Clients.ActiveDirectory;
using Microsoft.OpenApi.Models;
using Microsoft.Rest;

namespace Api
{
    public class Startup
    {
        public Startup(IConfiguration configuration)
        {
            Configuration = configuration;
        }

        public IConfiguration Configuration { get; }

        public void ConfigureServices(IServiceCollection services)
        {
            services.AddRouting(options => {
                options.LowercaseUrls = true;
            });

            services.AddSwaggerGen(c =>
            {
                c.SwaggerDoc("v1", new OpenApiInfo { Title = "ADF", Version = "v1" });
            });

            services.AddControllers();
        }

        public void Configure(IApplicationBuilder app, IWebHostEnvironment env)
        {
            if (env.IsDevelopment())
            {
                app.UseDeveloperExceptionPage();

                app.UseSwagger();
                app.UseSwaggerUI(c => c.SwaggerEndpoint("/swagger/v1/swagger.json", "ADF v1"));
            }

            app.UseHttpsRedirection();

            app.UseRouting();

            app.UseAuthorization();

            app.UseEndpoints(endpoints =>
            {
                endpoints.MapControllers();
            });
        }
    }
}
using Api.Options;
using Api.Services;
using Microsoft.AspNetCore.Builder;
using Microsoft.AspNetCore.Hosting;
using Microsoft.Azure.Management.DataFactory;
using Microsoft.Extensions.Configuration;
using Microsoft.Extensions.DependencyInjection;
using Microsoft.Extensions.Hosting;
using Microsoft.IdentityModel.Clients.ActiveDirectory;
using Microsoft.OpenApi.Models;
using Microsoft.Rest;
namespace Api
{
public class Startup
{
public Startup(IConfiguration configuration)
{
Configuration = configuration;
}
public IConfiguration Configuration { get; }
public void ConfigureServices(IServiceCollection services)
{
services.AddRouting(options => {
options.LowercaseUrls = true;
});
services.AddSwaggerGen(c =>
{
c.SwaggerDoc("v1", new OpenApiInfo { Title = "ADF", Version = "v1" });
});
services.AddControllers();
}
public void Configure(IApplicationBuilder app, IWebHostEnvironment env)
{
if (env.IsDevelopment())
{
app.UseDeveloperExceptionPage();
app.UseSwagger();
app.UseSwaggerUI(c => c.SwaggerEndpoint("/swagger/v1/swagger.json", "ADF v1"));
}
app.UseHttpsRedirection();
app.UseRouting();
app.UseAuthorization();
app.UseEndpoints(endpoints =>
{
endpoints.MapControllers();
});
}
}
}using Api.Options;
using Api.Services;
using Microsoft.AspNetCore.Builder;
using Microsoft.AspNetCore.Hosting;
using Microsoft.Azure.Management.DataFactory;
using Microsoft.Extensions.Configuration;
using Microsoft.Extensions.DependencyInjection;
using Microsoft.Extensions.Hosting;
using Microsoft.IdentityModel.Clients.ActiveDirectory;
using Microsoft.OpenApi.Models;
using Microsoft.Rest;
namespace Api
{
public class Startup
{
public Startup(IConfiguration configuration)
{
Configuration = configuration;
}
public IConfiguration Configuration { get; }
public void ConfigureServices(IServiceCollection services)
{
services.AddRouting(options => {
options.LowercaseUrls = true;
});
services.AddSwaggerGen(c =>
{
c.SwaggerDoc("v1", new OpenApiInfo { Title = "ADF", Version = "v1" });
});
services.AddControllers();
}
public void Configure(IApplicationBuilder app, IWebHostEnvironment env)
{
if (env.IsDevelopment())
{
app.UseDeveloperExceptionPage();
app.UseSwagger();
app.UseSwaggerUI(c => c.SwaggerEndpoint("/swagger/v1/swagger.json", "ADF v1"));
}
app.UseHttpsRedirection();
app.UseRouting();
app.UseAuthorization();
app.UseEndpoints(endpoints =>
{
endpoints.MapControllers();
});
}
}
}
Next, in the appsettings.json, appsettings.Develop.json, or any other appsettings. <Environment>.json we will add a section named "Azure" and add all the key-value pairs needed to access the Azure Data Factory so we can actually trigger and monitor our pipelines.
{
  "Logging": {
    "LogLevel": {
      "Default": "Information",
      "Microsoft": "Warning",
      "Microsoft.Hosting.Lifetime": "Information"
    }
  },
  "AllowedHosts": "*",
  "Azure": {
    "ResourceGroup": "<ResourceGroup>",
    "DataFactoryName": "<DataFactoryName>",
    "TenantId": "<TenantId>",
    "ApplicationId": "<ApplicationId>",
    "AuthenticationKey": "<AuthenticationKey>",
    "SubscriptionId": "<SubscriptionId>",
    "ActiveDirectoryAuthority": "https://login.microsoftonline.com/",
    "ResourceManagerUrl": "https://management.azure.com/"
  }
}
{
"Logging": {
"LogLevel": {
"Default": "Information",
"Microsoft": "Warning",
"Microsoft.Hosting.Lifetime": "Information"
}
},
"AllowedHosts": "*",
"Azure": {
"ResourceGroup": "<ResourceGroup>",
"DataFactoryName": "<DataFactoryName>",
"TenantId": "<TenantId>",
"ApplicationId": "<ApplicationId>",
"AuthenticationKey": "<AuthenticationKey>",
"SubscriptionId": "<SubscriptionId>",
"ActiveDirectoryAuthority": "https://login.microsoftonline.com/",
"ResourceManagerUrl": "https://management.azure.com/"
}
}{
"Logging": {
"LogLevel": {
"Default": "Information",
"Microsoft": "Warning",
"Microsoft.Hosting.Lifetime": "Information"
}
},
"AllowedHosts": "*",
"Azure": {
"ResourceGroup": "<ResourceGroup>",
"DataFactoryName": "<DataFactoryName>",
"TenantId": "<TenantId>",
"ApplicationId": "<ApplicationId>",
"AuthenticationKey": "<AuthenticationKey>",
"SubscriptionId": "<SubscriptionId>",
"ActiveDirectoryAuthority": "https://login.microsoftonline.com/",
"ResourceManagerUrl": "https://management.azure.com/"
}
}
Now we will create an AzureOptions.csclass that will mirror the keys in the appsettings.json file so that we can map the values from the configuration file to our class.
Note the property SectionName with the value "Azure" that represents the section in the .json configuration file.
namespace Api.Options
{
    public class AzureOptions
    {
        public const string SectionName = "Azure";

        public string ResourceGroup { get; set; }
        public string DataFactoryName { get; set; }
        public string TenantId { get; set; }
        public string ApplicationId { get; set; }
        public string AuthenticationKey { get; set; }
        public string SubscriptionId { get; set; }
        public string ActiveDirectoryAuthority { get; set; }
        public string ResourceManagerUrl { get; set; }
    }
}
namespace Api.Options
{
public class AzureOptions
{
public const string SectionName = "Azure";
public string ResourceGroup { get; set; }
public string DataFactoryName { get; set; }
public string TenantId { get; set; }
public string ApplicationId { get; set; }
public string AuthenticationKey { get; set; }
public string SubscriptionId { get; set; }
public string ActiveDirectoryAuthority { get; set; }
public string ResourceManagerUrl { get; set; }
}
}namespace Api.Options
{
public class AzureOptions
{
public const string SectionName = "Azure";
public string ResourceGroup { get; set; }
public string DataFactoryName { get; set; }
public string TenantId { get; set; }
public string ApplicationId { get; set; }
public string AuthenticationKey { get; set; }
public string SubscriptionId { get; set; }
public string ActiveDirectoryAuthority { get; set; }
public string ResourceManagerUrl { get; set; }
}
}
After setting up the configuration we will go back to the Startup.cs class to create an Azure DataFactoryClient that we will use for the actual functionalities of the application.
First, in the ConfigureServices method, we will use the IConfiguration and the SectionName property from the AzureOptions class to get the Azure configuration section from the configuration file. Next, we will register the configuration in the dependency injection (DI) container because we will need them later. Then we are going to cast azureConfiguration into a variable of type AzureOptions.
And now for the actual Data Factory client, we will first create an authentication context using the Azure Active Directory Authority and TenantId. Then, we are going to create the ClientCredentials using ApplicationId and AuthenticationKey. Using the AuthenticationContext, the Resource Manager URL, and the ClientCredentials, we are going to authenticate with the Azure Active Directory and create the ServiceClientCredentials using the AccessToken we got from the authentication response. And finally, using the credentials and the SubscriptionId we are going to create the DataFactoryManagementClient and register it in the DI container.
var azureConfiguration = Configuration
    .GetSection(AzureOptions.SectionName);

services.Configure<AzureOptions>(azureConfiguration);
var azureOptions = azureConfiguration.Get<AzureOptions>();

var context = new AuthenticationContext($"{azureOptions.ActiveDirectoryAuthority}/{azureOptions.TenantId}");
var clientCredentials = new ClientCredential(azureOptions.ApplicationId, azureOptions.AuthenticationKey);
var authResult = context.AcquireTokenAsync(azureOptions.ResourceManagerUrl, clientCredentials).Result;
ServiceClientCredentials credentials = new TokenCredentials(authResult.AccessToken);

services.AddTransient(options =>
{
    return new DataFactoryManagementClient(credentials)
    {
        SubscriptionId = azureOptions.SubscriptionId
    };
});
var azureConfiguration = Configuration
.GetSection(AzureOptions.SectionName);
services.Configure<AzureOptions>(azureConfiguration);
var azureOptions = azureConfiguration.Get<AzureOptions>();
var context = new AuthenticationContext($"{azureOptions.ActiveDirectoryAuthority}/{azureOptions.TenantId}");
var clientCredentials = new ClientCredential(azureOptions.ApplicationId, azureOptions.AuthenticationKey);
var authResult = context.AcquireTokenAsync(azureOptions.ResourceManagerUrl, clientCredentials).Result;
ServiceClientCredentials credentials = new TokenCredentials(authResult.AccessToken);
services.AddTransient(options =>
{
return new DataFactoryManagementClient(credentials)
{
SubscriptionId = azureOptions.SubscriptionId
};
});var azureConfiguration = Configuration
.GetSection(AzureOptions.SectionName);
services.Configure<AzureOptions>(azureConfiguration);
var azureOptions = azureConfiguration.Get<AzureOptions>();
var context = new AuthenticationContext($"{azureOptions.ActiveDirectoryAuthority}/{azureOptions.TenantId}");
var clientCredentials = new ClientCredential(azureOptions.ApplicationId, azureOptions.AuthenticationKey);
var authResult = context.AcquireTokenAsync(azureOptions.ResourceManagerUrl, clientCredentials).Result;
ServiceClientCredentials credentials = new TokenCredentials(authResult.AccessToken);
services.AddTransient(options =>
{
return new DataFactoryManagementClient(credentials)
{
SubscriptionId = azureOptions.SubscriptionId
};
});
The Azure Data Factory Service
And now for the pipeline trigger and monitor implementations, we will first create an IADFServiceinterface with two methods:
RunPipelineAsync - which will be used to trigger the pipeline taking the pipeline name that we want to trigger, parameters that the pipeline requires to run, and cancellation token as its parameters
GetPipelineStatusAsync - will be used to monitor the pipeline taking the pipeline runId and cancellation token as its parameters.
using System.Collections.Generic;
using System.Threading;
using System.Threading.Tasks;
using Microsoft.Azure.Management.DataFactory.Models;

namespace Api.Services
{
    public interface IADFService
    {
        Task<CreateRunResponse> RunPipelineAsync(string pipelineName, IDictionary<string, object> parameters, CancellationToken cancellationToken);
        Task<PipelineRun> GetPipelineStatusAsync(string runId, CancellationToken cancellationToken);
    }
}
using System.Collections.Generic;
using System.Threading;
using System.Threading.Tasks;
using Microsoft.Azure.Management.DataFactory.Models;
namespace Api.Services
{
public interface IADFService
{
Task<CreateRunResponse> RunPipelineAsync(string pipelineName, IDictionary<string, object> parameters, CancellationToken cancellationToken);
Task<PipelineRun> GetPipelineStatusAsync(string runId, CancellationToken cancellationToken);
}
}using System.Collections.Generic;
using System.Threading;
using System.Threading.Tasks;
using Microsoft.Azure.Management.DataFactory.Models;
namespace Api.Services
{
public interface IADFService
{
Task<CreateRunResponse> RunPipelineAsync(string pipelineName, IDictionary<string, object> parameters, CancellationToken cancellationToken);
Task<PipelineRun> GetPipelineStatusAsync(string runId, CancellationToken cancellationToken);
}
}
In the ADFService.cs we will implement the IADFService interface. The implementation class will receive its dependencies on AzureOptions (using the Options pattern) and the DataFactoryManagementClient through the constructor dependency injection.
In the RunPipelineAsync method, using the DataFactoryManagementClient and its property Pipeline we will call CreateRunAsync and pass the Resource Group, Data Factory name, Pipeline name, parameters, and the cancellation token which will trigger the pipeline and return an instance of CreateReturnResponse that contains the pipeline runId that we will use for monitoring the pipeline run.
In the GetPipelineStatus method, using the DataFactoryManagementClient and its property PipelineRuns we will call the GetAsync method and pass the Resource Group, Data Factory name, the pipeline run id, and the cancellation token, which will return an instance of PipelineRun.
using System.Collections.Generic;
using System.Threading;
using System.Threading.Tasks;
using Api.Options;
using Microsoft.Azure.Management.DataFactory;
using Microsoft.Azure.Management.DataFactory.Models;
using Microsoft.Extensions.Options;

namespace Api.Services
{
    public class ADFService : IADFService
    {
        private readonly AzureOptions _azureOptions;
        private readonly DataFactoryManagementClient _dataFactoryManagementClient;

        public ADFService(IOptions<AzureOptions> azureOptions, DataFactoryManagementClient dataFactoryManagementClient)
        {
            _azureOptions = azureOptions.Value;
            _dataFactoryManagementClient = dataFactoryManagementClient;
        }

        public async Task<PipelineRun> GetPipelineStatusAsync(string runId, CancellationToken cancellationToken = default)
        {
            var pipelineRun = await _dataFactoryManagementClient.PipelineRuns.GetAsync(
                _azureOptions.ResourceGroup,
                _azureOptions.DataFactoryName,
                runId,
                cancellationToken);

            return pipelineRun;
        }

        public async Task<CreateRunResponse> RunPipelineAsync(string pipelineName,
            IDictionary<string, object> parameters,
            CancellationToken cancellationToken = default
        )
        {
            var runResponse = await _dataFactoryManagementClient.Pipelines.CreateRunAsync(
                _azureOptions.ResourceGroup,
                _azureOptions.DataFactoryName,
                pipelineName,
                parameters: parameters,
                cancellationToken: cancellationToken);

            return runResponse;
        }
    }
}
using System.Collections.Generic;
using System.Threading;
using System.Threading.Tasks;
using Api.Options;
using Microsoft.Azure.Management.DataFactory;
using Microsoft.Azure.Management.DataFactory.Models;
using Microsoft.Extensions.Options;
namespace Api.Services
{
public class ADFService : IADFService
{
private readonly AzureOptions _azureOptions;
private readonly DataFactoryManagementClient _dataFactoryManagementClient;
public ADFService(IOptions<AzureOptions> azureOptions, DataFactoryManagementClient dataFactoryManagementClient)
{
_azureOptions = azureOptions.Value;
_dataFactoryManagementClient = dataFactoryManagementClient;
}
public async Task<PipelineRun> GetPipelineStatusAsync(string runId, CancellationToken cancellationToken = default)
{
var pipelineRun = await _dataFactoryManagementClient.PipelineRuns.GetAsync(
_azureOptions.ResourceGroup,
_azureOptions.DataFactoryName,
runId,
cancellationToken);
return pipelineRun;
}
public async Task<CreateRunResponse> RunPipelineAsync(string pipelineName,
IDictionary<string, object> parameters,
CancellationToken cancellationToken = default
)
{
var runResponse = await _dataFactoryManagementClient.Pipelines.CreateRunAsync(
_azureOptions.ResourceGroup,
_azureOptions.DataFactoryName,
pipelineName,
parameters: parameters,
cancellationToken: cancellationToken);
return runResponse;
}
}
}using System.Collections.Generic;
using System.Threading;
using System.Threading.Tasks;
using Api.Options;
using Microsoft.Azure.Management.DataFactory;
using Microsoft.Azure.Management.DataFactory.Models;
using Microsoft.Extensions.Options;
namespace Api.Services
{
public class ADFService : IADFService
{
private readonly AzureOptions _azureOptions;
private readonly DataFactoryManagementClient _dataFactoryManagementClient;
public ADFService(IOptions<AzureOptions> azureOptions, DataFactoryManagementClient dataFactoryManagementClient)
{
_azureOptions = azureOptions.Value;
_dataFactoryManagementClient = dataFactoryManagementClient;
}
public async Task<PipelineRun> GetPipelineStatusAsync(string runId, CancellationToken cancellationToken = default)
{
var pipelineRun = await _dataFactoryManagementClient.PipelineRuns.GetAsync(
_azureOptions.ResourceGroup,
_azureOptions.DataFactoryName,
runId,
cancellationToken);
return pipelineRun;
}
public async Task<CreateRunResponse> RunPipelineAsync(string pipelineName,
IDictionary<string, object> parameters,
CancellationToken cancellationToken = default
)
{
var runResponse = await _dataFactoryManagementClient.Pipelines.CreateRunAsync(
_azureOptions.ResourceGroup,
_azureOptions.DataFactoryName,
pipelineName,
parameters: parameters,
cancellationToken: cancellationToken);
return runResponse;
}
}
}
And lastly, for this section, we will register the ADFService into the DI container so we can use it in the controllers.
services.AddTransient<IADFService, ADFService>();
services.AddTransient<IADFService, ADFService>();
services.AddTransient<IADFService, ADFService>();
In ADFController we are going to create two methods that are going to use the IADFService interface and call our methods for triggering and monitoring the pipeline and return the appropriate HTTP response.
using System;
using System.Threading;
using System.Threading.Tasks;
using Api.Contracts.Requests;
using Api.Services;
using Microsoft.AspNetCore.Mvc;

namespace Api.Controllers
{
    [Route("api/[controller]")]
    [ApiController]
    public class ADFController : ControllerBase
    {
        private readonly IADFService _adfService;

        public ADFController(IADFService adfService)
        {
            _adfService = adfService;
        }

        [HttpPost("pipeline")]
        public async Task<IActionResult> TriggerPipelineAsync(TriggerPipelineRequest request, CancellationToken cancellationToken = default)
        {
            var response = await _adfService.RunPipelineAsync(request.PipelineName, request.Parameters, cancellationToken);

            if (response != null)
            {
                return CreatedAtAction(nameof(GetPipelineStatus), new { id = response.RunId }, response);
            }

            return NotFound();

        }

        [HttpGet("pipeline/{id}")]
        public async Task<IActionResult> GetPipelineStatus(Guid id, CancellationToken cancellationToken = default)
        {
            var response = await _adfService.GetPipelineStatusAsync(id.ToString(), cancellationToken);

            if (response != null)
            {
                return Ok(response);
            }

            return NotFound();
        }
    }
}
using System;
using System.Threading;
using System.Threading.Tasks;
using Api.Contracts.Requests;
using Api.Services;
using Microsoft.AspNetCore.Mvc;
namespace Api.Controllers
{
[Route("api/[controller]")]
[ApiController]
public class ADFController : ControllerBase
{
private readonly IADFService _adfService;
public ADFController(IADFService adfService)
{
_adfService = adfService;
}
[HttpPost("pipeline")]
public async Task<IActionResult> TriggerPipelineAsync(TriggerPipelineRequest request, CancellationToken cancellationToken = default)
{
var response = await _adfService.RunPipelineAsync(request.PipelineName, request.Parameters, cancellationToken);
if (response != null)
{
return CreatedAtAction(nameof(GetPipelineStatus), new { id = response.RunId }, response);
}
return NotFound();
}
[HttpGet("pipeline/{id}")]
public async Task<IActionResult> GetPipelineStatus(Guid id, CancellationToken cancellationToken = default)
{
var response = await _adfService.GetPipelineStatusAsync(id.ToString(), cancellationToken);
if (response != null)
{
return Ok(response);
}
return NotFound();
}
}
}using System;
using System.Threading;
using System.Threading.Tasks;
using Api.Contracts.Requests;
using Api.Services;
using Microsoft.AspNetCore.Mvc;
namespace Api.Controllers
{
[Route("api/[controller]")]
[ApiController]
public class ADFController : ControllerBase
{
private readonly IADFService _adfService;
public ADFController(IADFService adfService)
{
_adfService = adfService;
}
[HttpPost("pipeline")]
public async Task<IActionResult> TriggerPipelineAsync(TriggerPipelineRequest request, CancellationToken cancellationToken = default)
{
var response = await _adfService.RunPipelineAsync(request.PipelineName, request.Parameters, cancellationToken);
if (response != null)
{
return CreatedAtAction(nameof(GetPipelineStatus), new { id = response.RunId }, response);
}
return NotFound();
}
[HttpGet("pipeline/{id}")]
public async Task<IActionResult> GetPipelineStatus(Guid id, CancellationToken cancellationToken = default)
{
var response = await _adfService.GetPipelineStatusAsync(id.ToString(), cancellationToken);
if (response != null)
{
return Ok(response);
}
return NotFound();
}
}
}
The action request object TriggerPipelineRequest.cs
using System.Collections.Generic;

namespace Api.Contracts.Requests
{
    public class TriggerPipelineRequest
    {
        public string PipelineName { get; set; }
        public Dictionary<string, object> Parameters { get; set; }
    }
}
using System.Collections.Generic;
namespace Api.Contracts.Requests
{
public class TriggerPipelineRequest
{
public string PipelineName { get; set; }
public Dictionary<string, object> Parameters { get; set; }
}
}using System.Collections.Generic;
namespace Api.Contracts.Requests
{
public class TriggerPipelineRequest
{
public string PipelineName { get; set; }
public Dictionary<string, object> Parameters { get; set; }
}
}
Error Handling
One last thing that we are going to add to our API is error handling.
In the ADFService, the methods that we use to trigger and monitor the pipeline can actually throw an exception if we pass them invalid parameters (ex. trying to trigger a pipeline that doesn't exist, passing in the wrong run id when trying to monitor the pipeline). We could add a try-catch block in the service and handle the errors there, but we are going to use a simpler way of adding a form of middleware, a filter.
using Microsoft.AspNetCore.Mvc;
using Microsoft.AspNetCore.Mvc.Filters;
using Microsoft.Rest.Azure;

namespace Api.Filters
{
    public class ErrorFilter : ExceptionFilterAttribute
    {
        public override void OnException(ExceptionContext context)
        {
            if (context.Exception is CloudException exception)
            {
                context.ModelState.AddModelError("Error", exception.Message);
                context.HttpContext.Response.StatusCode = (int)exception.Response.StatusCode;
            }

            context.Result = new JsonResult(context.ModelState);
        }
    }
}
using Microsoft.AspNetCore.Mvc;
using Microsoft.AspNetCore.Mvc.Filters;
using Microsoft.Rest.Azure;
namespace Api.Filters
{
public class ErrorFilter : ExceptionFilterAttribute
{
public override void OnException(ExceptionContext context)
{
if (context.Exception is CloudException exception)
{
context.ModelState.AddModelError("Error", exception.Message);
context.HttpContext.Response.StatusCode = (int)exception.Response.StatusCode;
}
context.Result = new JsonResult(context.ModelState);
}
}
}using Microsoft.AspNetCore.Mvc;
using Microsoft.AspNetCore.Mvc.Filters;
using Microsoft.Rest.Azure;
namespace Api.Filters
{
public class ErrorFilter : ExceptionFilterAttribute
{
public override void OnException(ExceptionContext context)
{
if (context.Exception is CloudException exception)
{
context.ModelState.AddModelError("Error", exception.Message);
context.HttpContext.Response.StatusCode = (int)exception.Response.StatusCode;
}
context.Result = new JsonResult(context.ModelState);
}
}
}
In order to create an exception filter, we need to inherit from the ExceptionFilterAttribute and override the OnException method to define our custom behaviors.
Both the methods we called are going to throw an exception of type CloudException. So we are going to use a neat feature of C# called Pattern Matching to check if the ExceptionContext contains a property Exception of type CloudException, and if it does, cast that exception into a new variable called an exception. The casting part is important mainly so we can access the property Response and get the StatusCode of the error.
And finally, in order to use the filter, we will go back to the Startup.cs and add it as part of our controller configuration.
services.AddControllers(i => i.Filters.Add<ErrorFilter>());
services.AddControllers(i => i.Filters.Add<ErrorFilter>());
services.AddControllers(i => i.Filters.Add<ErrorFilter>());
Showcase
For the showcase, we are going to use the Swagger client to first trigger a pipeline named "Blog_Pipeline" which takes the username parameter.

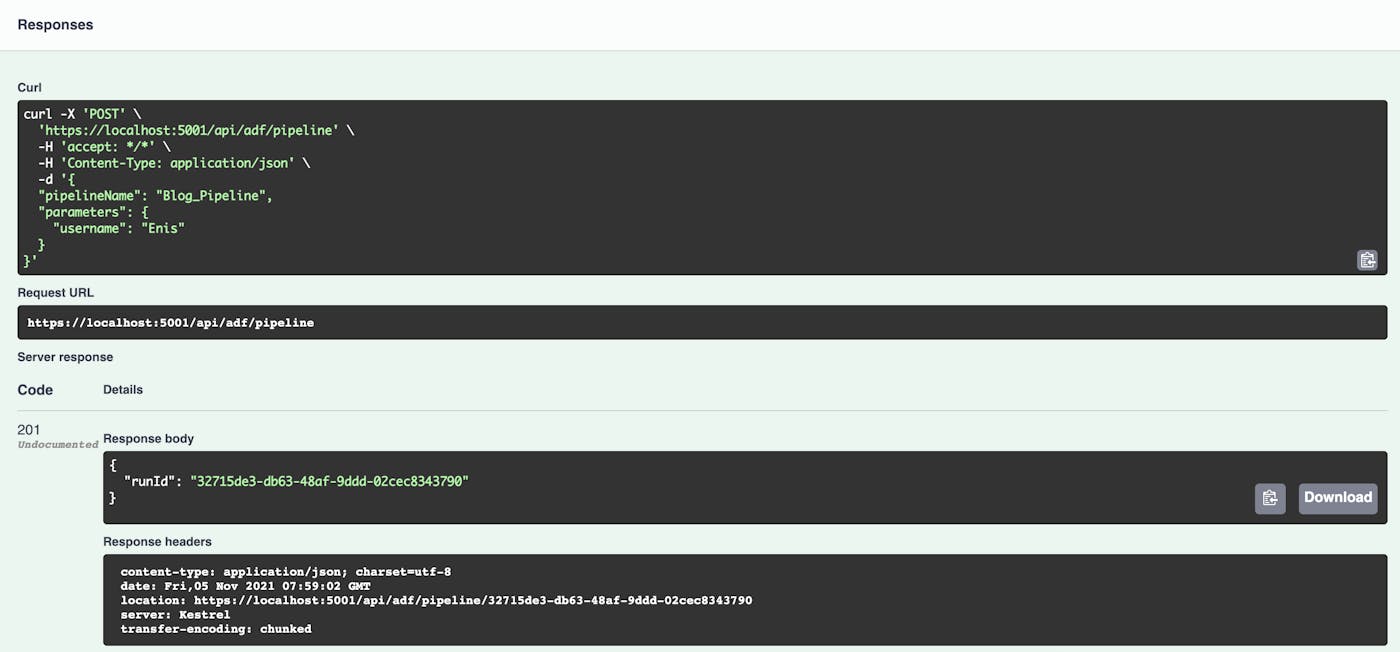
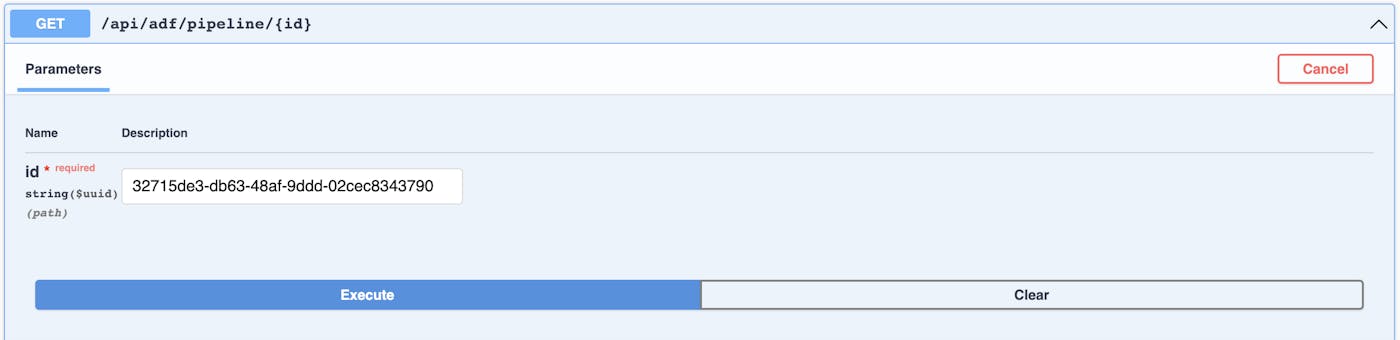
If the pipeline gets triggered successfully we will get the runId as a response. Now, we can use this Id in the GET action to monitor this pipeline.
Below we can see the response we get by calling the "monitor" endpoint.
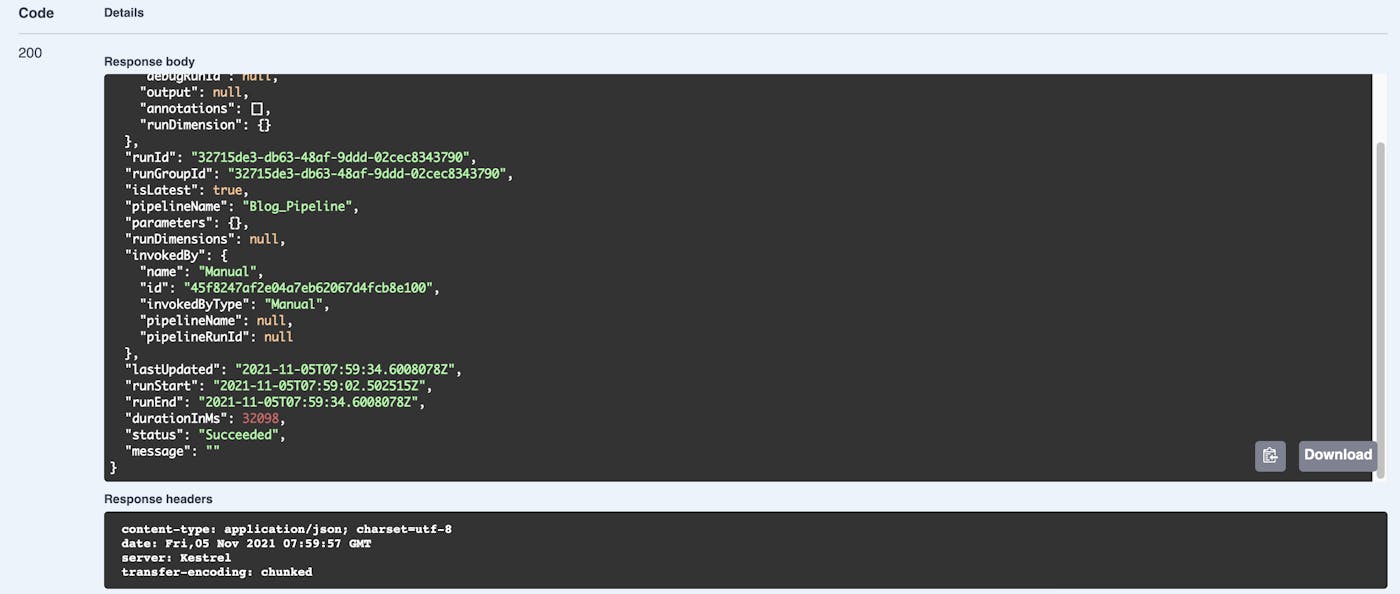
{
  "additionalProperties": {
    "id": "/SUBSCRIPTIONS/{SubscriptionId}/RESOURCEGROUPS/{ResourceGroups}/PROVIDERS/MICROSOFT.DATAFACTORY/FACTORIES/{FactoryName}/pipelineruns/32715de3-db63-48af-9ddd-02cec8343790",
    "debugRunId": null,
    "output": null,
    "annotations": [],
    "runDimension": {}
  },
  "runId": "32715de3-db63-48af-9ddd-02cec8343790",
  "runGroupId": "32715de3-db63-48af-9ddd-02cec8343790",
  "isLatest": true,
  "pipelineName": "Blog_Pipeline",
  "parameters": {},
  "runDimensions": null,
  "invokedBy": {
    "name": "Manual",
    "id": "45f8247af2e04a7eb62067d4fcb8e100",
    "invokedByType": "Manual",
    "pipelineName": null,
    "pipelineRunId": null
  },
  "lastUpdated": "2021-11-05T07:59:34.6008078Z",
  "runStart": "2021-11-05T07:59:02.502515Z",
  "runEnd": "2021-11-05T07:59:34.6008078Z",
  "durationInMs": 32098,
  "status": "Succeeded",
  "message": ""
}
{
"additionalProperties": {
"id": "/SUBSCRIPTIONS/{SubscriptionId}/RESOURCEGROUPS/{ResourceGroups}/PROVIDERS/MICROSOFT.DATAFACTORY/FACTORIES/{FactoryName}/pipelineruns/32715de3-db63-48af-9ddd-02cec8343790",
"debugRunId": null,
"output": null,
"annotations": [],
"runDimension": {}
},
"runId": "32715de3-db63-48af-9ddd-02cec8343790",
"runGroupId": "32715de3-db63-48af-9ddd-02cec8343790",
"isLatest": true,
"pipelineName": "Blog_Pipeline",
"parameters": {},
"runDimensions": null,
"invokedBy": {
"name": "Manual",
"id": "45f8247af2e04a7eb62067d4fcb8e100",
"invokedByType": "Manual",
"pipelineName": null,
"pipelineRunId": null
},
"lastUpdated": "2021-11-05T07:59:34.6008078Z",
"runStart": "2021-11-05T07:59:02.502515Z",
"runEnd": "2021-11-05T07:59:34.6008078Z",
"durationInMs": 32098,
"status": "Succeeded",
"message": ""
}{
"additionalProperties": {
"id": "/SUBSCRIPTIONS/{SubscriptionId}/RESOURCEGROUPS/{ResourceGroups}/PROVIDERS/MICROSOFT.DATAFACTORY/FACTORIES/{FactoryName}/pipelineruns/32715de3-db63-48af-9ddd-02cec8343790",
"debugRunId": null,
"output": null,
"annotations": [],
"runDimension": {}
},
"runId": "32715de3-db63-48af-9ddd-02cec8343790",
"runGroupId": "32715de3-db63-48af-9ddd-02cec8343790",
"isLatest": true,
"pipelineName": "Blog_Pipeline",
"parameters": {},
"runDimensions": null,
"invokedBy": {
"name": "Manual",
"id": "45f8247af2e04a7eb62067d4fcb8e100",
"invokedByType": "Manual",
"pipelineName": null,
"pipelineRunId": null
},
"lastUpdated": "2021-11-05T07:59:34.6008078Z",
"runStart": "2021-11-05T07:59:02.502515Z",
"runEnd": "2021-11-05T07:59:34.6008078Z",
"durationInMs": 32098,
"status": "Succeeded",
"message": ""
}Conclusion
Creating and executing ETL processes has never been easier using Azure Data Factory with a wide range of transformational, movement, and control activities to choose from. Sometimes, for various other reasons like allowing users to execute ETL process through the UI, waiting for some local processing to be done, or for any other use-case that is not covered by Azure mechanisms for that matter, you can trigger these processes outside of Azure Portal, so in this tutorial, we have shown one of the possible ways to achieve that.
Source code of the demo application
" height="48.00000014038086px" id="xQ5vVHKqO" width="172.73399414062501px"/></svg>)


" height="48.00000014038086px" id="y_gzzqZQT" width="172.73500122070314px"/></svg>)
